In this article:
- Getting Started with Creative Photoshop Ideas
- Essential Photoshop Effects for Visual Impact
- Photoshop Techniques for Artistic Transformation
- Advanced Photoshop Concepts for 2026
- Creative Photoshop Effects for Portrait Enhancement
- Specialized Photoshop Projects for 2026
- Taking Your Photoshop Skills to the Next Level
As a designer or photographer, having a toolbox of creative Photoshop ideas can be one of the most powerful assets at your disposal. Yet so many creatives find themselves stuck in a rut, using the same techniques over and over again, or feeling overwhelmed by Photoshop’s vast capabilities.
In my experience working with creatives for over a decade, I’ve noticed that many photographers and designers barely scratch the surface of what’s possible with Photoshop. They learn a handful of basic techniques and stop there, missing out on the creative potential that could truly set their work apart.
That’s why I’ve put together this comprehensive guide of 25 creative Photoshop ideas that can transform your images from basic to breathtaking. Whether you’re just starting your Photoshop journey or looking to expand your skillset, these techniques will help you create images that captivate clients and stand out in a crowded marketplace.
Let’s dig in and explore how you can take your Photoshop skills to the next level in 2025.
Getting Started with Creative Photoshop Ideas
Before we dive into specific techniques, let’s establish a foundation for creative exploration in Photoshop. The key to mastering Photoshop isn’t just knowing which buttons to press—it’s developing a creative mindset that sees possibilities beyond the obvious.
When approaching any image editing project, I encourage you to ask: “What could this image become?” rather than just “How can I fix this image?” This shift in perspective opens up endless creative avenues and transforms editing from a corrective process into a creative one.
Now, let’s explore 25 creative Photoshop ideas that can revolutionize your visual content in 2025.
Essential Photoshop Effects for Visual Impact
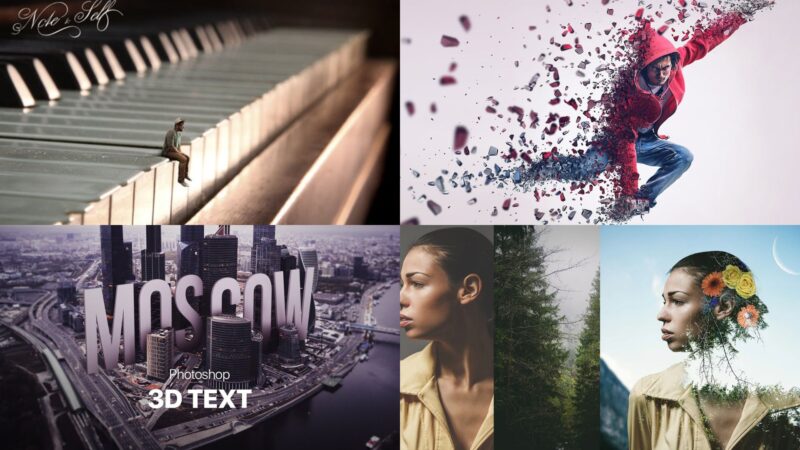
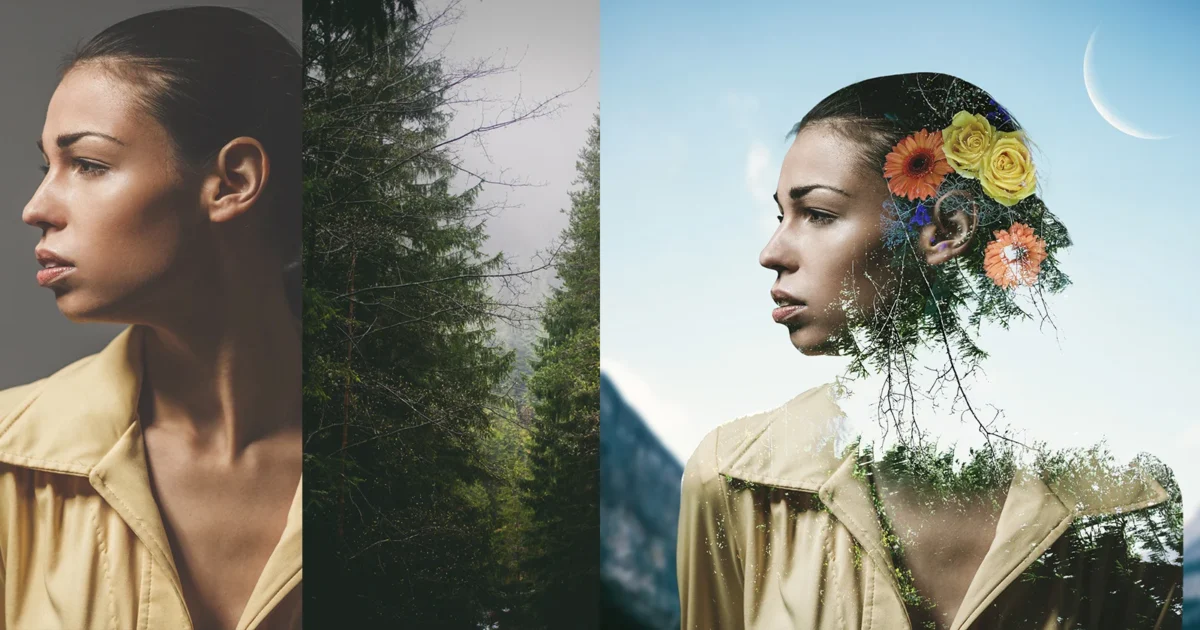
1. Double Exposure Effect: Blending Stories Together
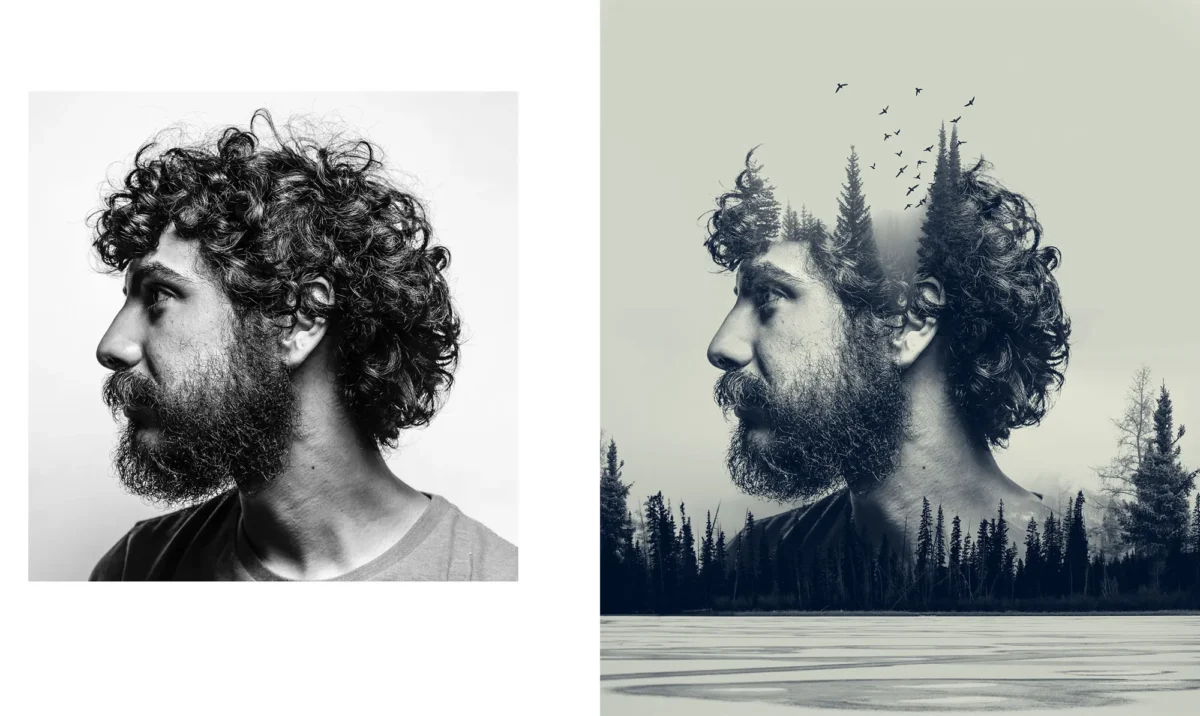
The double exposure effect is one of my favorite techniques for creating visually striking images with conceptual depth. Unlike the traditional film technique where two exposures are made on the same frame, Photoshop gives you precise control over how your images blend together.
What makes this technique powerful is how it allows you to tell two stories simultaneously. Typically used with portraits, you can blend a subject with landscapes, cityscapes, or abstract textures to create a visual narrative that’s greater than the sum of its parts.
To create an effective double exposure, focus on these key aspects:
Creating Contrast Between Your Elements
Choose images with strong tonal differences—a silhouette against a textured background works exceptionally well. The contrast helps each element maintain its visual identity while still blending harmoniously.
Mastering Layer Masks and Blending Modes
Experiment with different blending modes like Screen, Overlay, or Soft Light to create different effects. Layer masks will give you precise control over where and how your images blend together.
Telling a Cohesive Story
The most powerful double exposures connect the subject with relevant imagery. For instance, blending a portrait with elements that reveal something about the subject’s personality, profession, or passions creates a more meaningful composition.
2. Selective Color: Drawing Focus with Precision
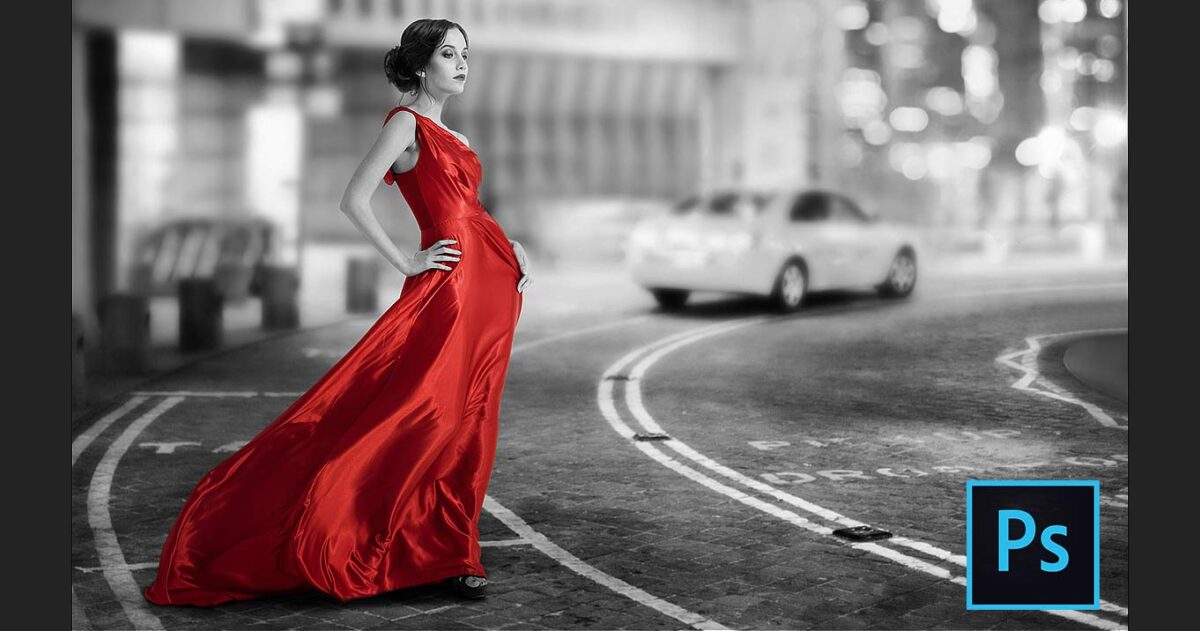
The selective color technique (sometimes called the “color splash effect”) transforms an image by converting it to black and white while preserving color in specific areas. This creates powerful visual contrast that immediately draws the viewer’s eye to the colored elements.
Beyond the basic application, consider these creative approaches:
Using Color to Guide Narrative
Retain color only in elements that tell a story or convey emotion. A red umbrella in a rainy street scene or a single yellow flower in a field creates visual poetry through contrast.
Creating Gradual Color Transitions
Instead of a stark division between color and black-and-white, create gradual transitions using gradient masks that slowly blend from full color to monochrome across your image.
Selecting Unexpected Elements
While it’s common to highlight obvious subjects, consider preserving color in unexpected elements that might otherwise go unnoticed, creating visual surprise and delight.
3. Cinematic Color Grading: Hollywood Appeal
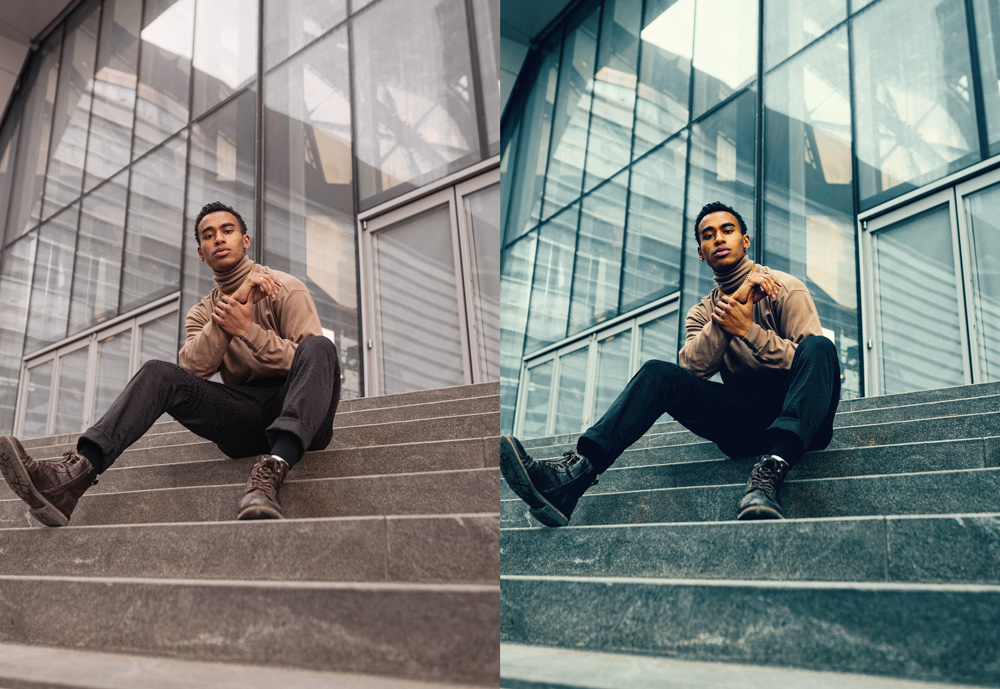
Cinematic color grading brings the dramatic visual aesthetics of film to your still images. This technique goes beyond basic color correction to create a cohesive mood and atmosphere.
Professional cinematographers spend years perfecting their color palettes, but you can achieve impressive results with these approaches:
Creating Complementary Color Schemes
Many blockbuster films use complementary colors (like orange and teal) to create visual harmony while separating subjects from backgrounds. Experiment with Curves, Color Balance, and Split Toning to achieve this aesthetic.
Using LUTs (Look-Up Tables)
LUTs are essentially color presets that can be applied to your images. Many professional cinematographers have created LUTs you can use as starting points for your own color grading.
Adding Atmosphere with Light Leaks and Grain
Subtle light leaks and film grain can enhance the cinematic feeling. Create these effects using adjustment layers and noise filters to simulate the imperfections that give film its character.
4. Surreal Miniatures: Playing with Scale

The surreal miniature effect (also known as the “tilt-shift effect”) transforms real-world scenes into what appear to be miniature models by manipulating depth of field and color saturation.
While specialized tilt-shift lenses can create this effect in-camera, Photoshop allows you to apply it to any image with these techniques:
Strategic Blur Application
The key is applying a graduated blur to the top and bottom of your image while keeping a horizontal strip in focus. This simulates the shallow depth of field characteristic of close-up photography.
Enhancing Color and Contrast
Miniature models typically have more saturated colors and higher contrast than real scenes. Boost these elements to enhance the illusion.
Choosing the Right Perspective
This effect works best with images shot from elevated angles looking down at the scene—similar to how you’d view an actual miniature model.
5. Dispersion Effect: Dissolving Boundaries

The dispersion effect creates the illusion that your subject is breaking apart into particles, creating a sense of motion and transformation. It’s particularly effective for conveying concepts like transformation, dissolution, or transcendence.
To create a compelling dispersion effect:
Using Strategic Brushwork
The quality of your dispersion depends on your brush technique. Create custom brushes with varying densities and scatter settings to achieve natural-looking particle distributions.
Maintaining Physical Plausibility
Consider which direction your particles would naturally move. For instance, if suggesting upward movement, have particles become smaller and more scattered as they move upward.
Adding Motion Blur
Apply subtle motion blur to your particles to enhance the sense of movement and integration with the environment.
Photoshop Techniques for Artistic Transformation
6. Digital Watercolor: From Photo to Painting
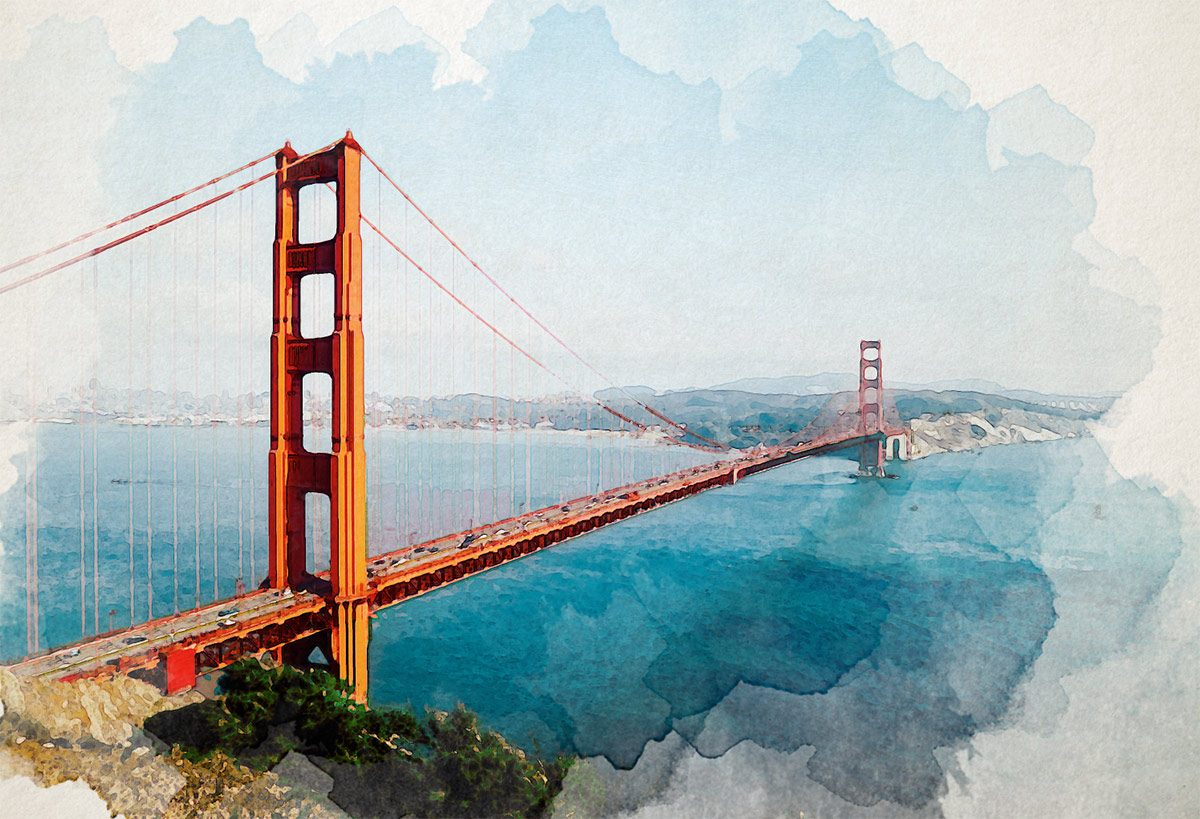
The digital watercolor effect transforms photographs into painterly art pieces that mimic the flowing, transparent quality of watercolor paintings.
Unlike simple filter applications, creating a convincing watercolor effect requires thoughtful consideration of artistic principles:
Understanding Watercolor Dynamics
Real watercolors have characteristic edge qualities, color bleeds, and paper textures. Use layer masks and custom brushes to recreate these elements.
Simplifying Visual Elements
Watercolor artists often simplify complex details. Use the Cutout filter as a starting point, then refine with brushwork to create the impression of essential forms.
Adding Authentic Medium Effects
Incorporate paper texture, subtle color pooling, and granulation effects to enhance authenticity. These details separate amateur efforts from professional-quality transformations.
7. Photo Compositing: Creating New Realities
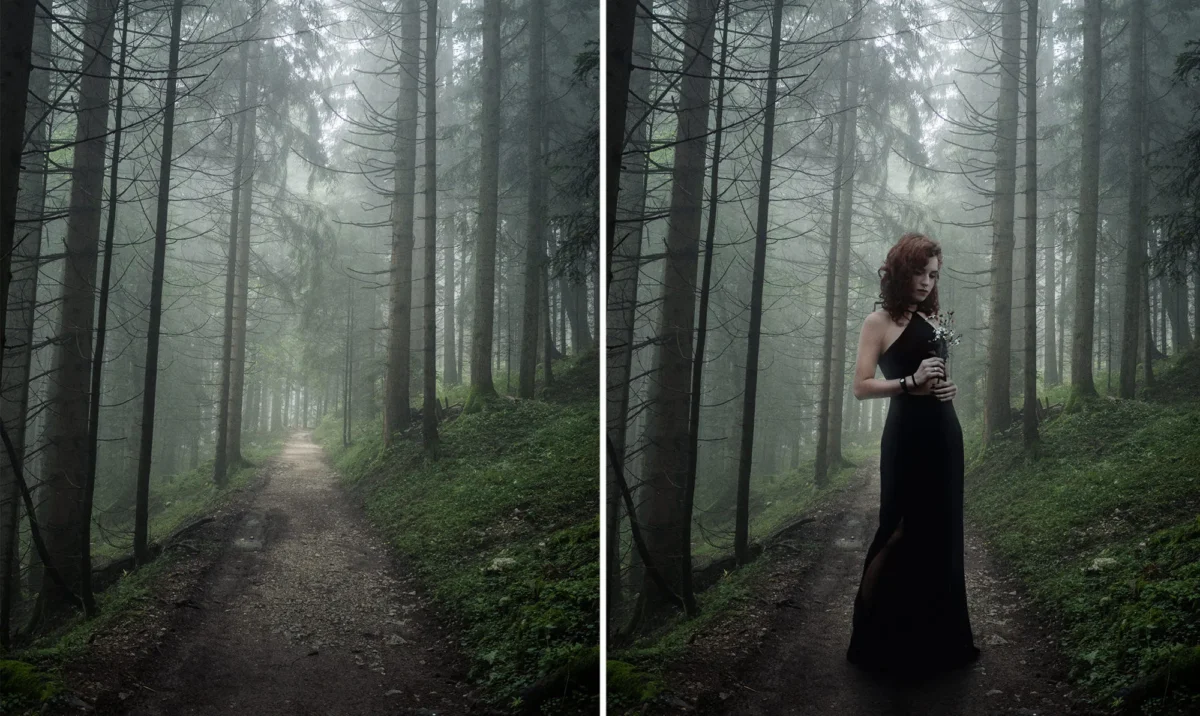
Photo compositing is the art of combining multiple images to create a scene that couldn’t exist in reality. This technique gives you unlimited creative freedom to express concepts, tell stories, or simply create fantastical imagery.
To create seamless composites:
Matching Light Sources
Pay careful attention to the direction, quality, and color of light in each element. Inconsistent lighting immediately reveals a composite as artificial.
Creating Coherent Perspective
All elements should conform to a consistent perspective. Use Photoshop’s transform tools to adjust scale and perspective until everything appears to exist in the same three-dimensional space.
Adding Environmental Integration
Elements should interact with their environment through shadows, reflections, and atmospheric effects. These details create the illusion that everything belongs together in the scene.
8. Glitch Effect: Digital Distortion Art
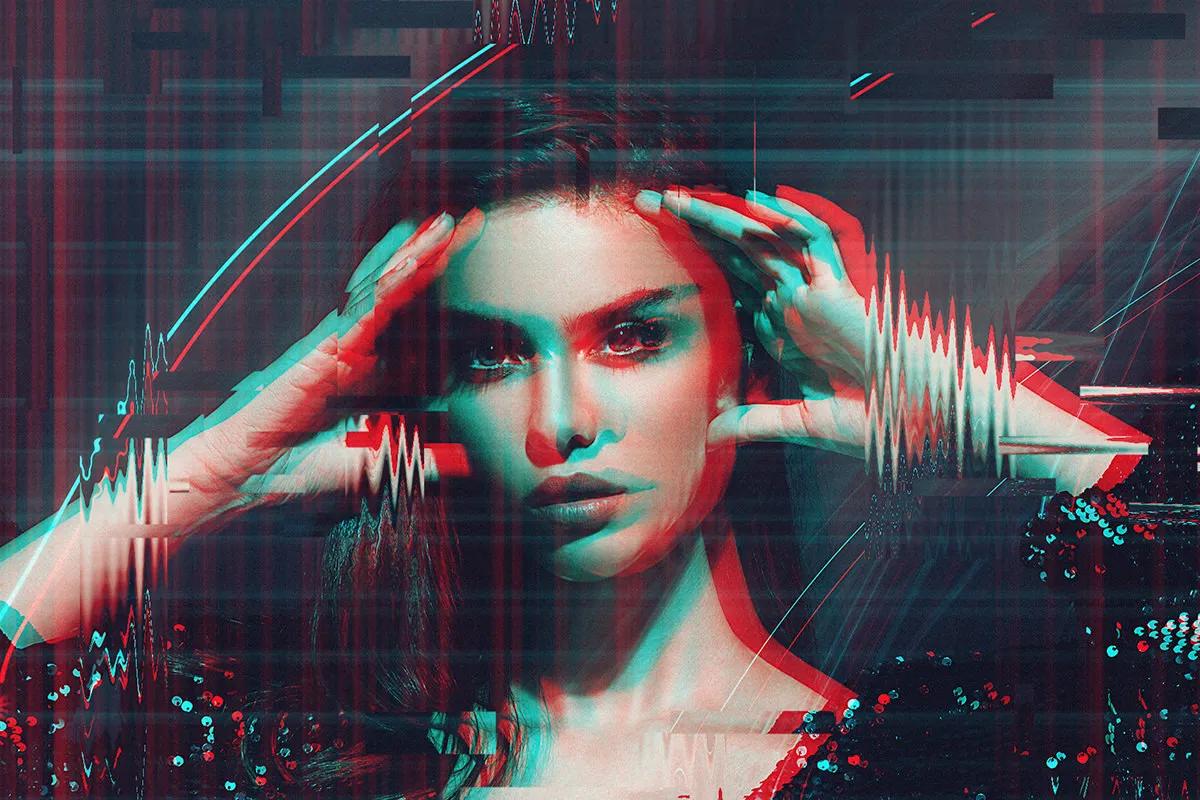
The glitch effect recreates the visual artifacts associated with digital or analog errors, creating a distinctive aesthetic that can convey themes of technology, dystopia, or digital culture.
To create sophisticated glitch effects:
Working with Channels
Manipulate RGB channels individually to create color shifts and distortions that mimic actual digital errors.
Using Wave and Displacement Filters
These filters can create the characteristic shifting and distortion of glitched imagery. Apply them selectively using layer masks for controlled chaos.
Incorporating Scan Lines and Noise
Add horizontal scan lines and digital noise to enhance the technological feel of your glitch effect.
9. Cinemagraphs: Still Photos with Motion

Cinemagraphs are hybrid images that combine the stability of a photograph with subtle, repeating motion in selected areas. They create a mesmerizing effect that’s perfect for digital advertising and social media content.
To create effective cinemagraphs:
Planning for Motion Isolation
Shoot video with a tripod to ensure static elements remain perfectly aligned. Identify which element will have motion and ensure it has a natural, looping quality.
Masking with Precision
Use frame-by-frame masking to isolate moving elements from static ones. The cleaner this separation, the more striking the final effect.
Creating Seamless Loops
The motion should loop without visible jumps or hiccups. Use Photoshop’s Timeline feature to fine-tune your animation frames for perfect continuity.
10. Retro and Vintage Effects: Nostalgia by Design

Retro and vintage effects transport images to different eras by mimicking the characteristic looks of older photographic processes and time periods.
To create authentic-looking vintage effects:
Understanding Historical Processes
Different decades had distinct photographic looks. Research specific time periods to understand color palettes, contrast levels, and common artifacts.
Adding Period-Appropriate Textures
Incorporate film grain, scratches, dust, or light leaks that would be characteristic of the era you’re recreating.
Color Grading with Historical Accuracy
Use Curves, Color Balance, and Split Toning to recreate the color profiles of different film stocks or printing processes from your chosen era.
Advanced Photoshop Concepts for 2026
11. AI-Enhanced Editing: Collaboration with Technology
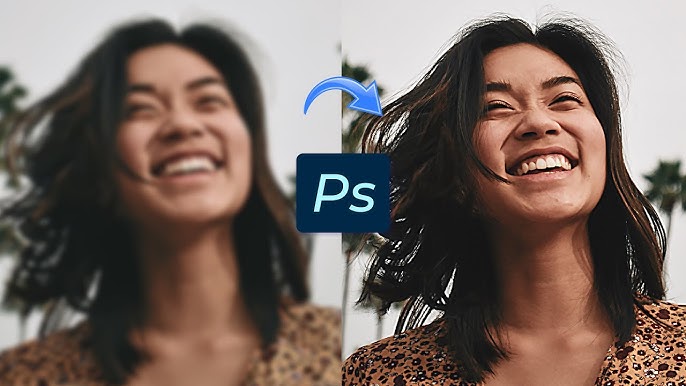
In 2026, Adobe’s AI capabilities have evolved substantially, offering powerful tools that can work alongside your creative vision to enhance your workflow and outcomes.
Using Generative Fill Creatively
Generative Fill can do more than just remove unwanted elements. Use it to imagine alternative versions of your scenes, extend canvases in unexpected ways, or create entirely new elements that blend seamlessly with your existing imagery.
Exploring Neural Filters
Neural Filters can transform expressions, age subjects, or apply artistic styles with increasing sophistication. The key is using them as starting points rather than final solutions—always refine the results with your own artistic judgment.
Creating Custom AI Workflows
Develop personalized actions and workflows that combine AI tools with traditional techniques to address your specific creative needs and style preferences.
12. 3D Integration: Adding Dimension
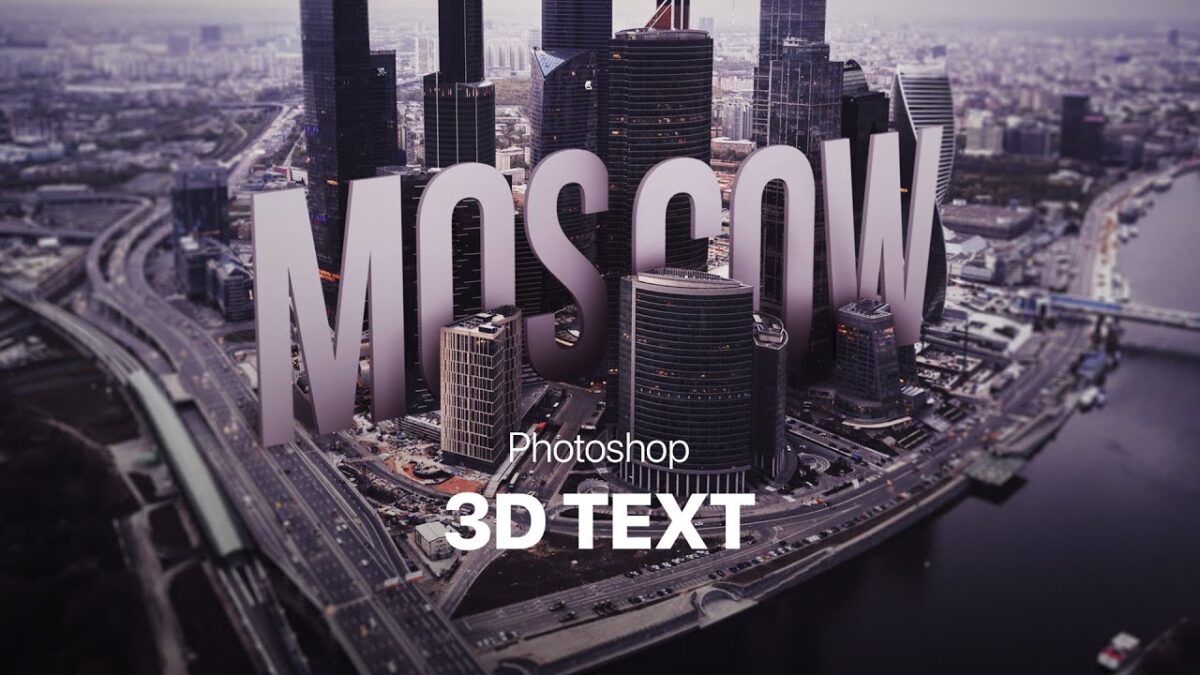
Photoshop’s 3D capabilities allow you to integrate three-dimensional elements into your compositions, creating depth and realism that was once only possible with specialized software.
Creating Realistic Product Mockups
Design packaging, books, or products in 3D space and place them in real-world environments with proper lighting and perspective.
Building Depth Maps for Enhanced Portraits
Use depth maps to create realistic depth of field effects or to prepare images for platforms that support 3D photo formats.
Integrating 3D Models with Photography
Import 3D objects and position them within photographic scenes, adjusting lighting and shadows for seamless integration.
13. Matte Painting: Digital Environments
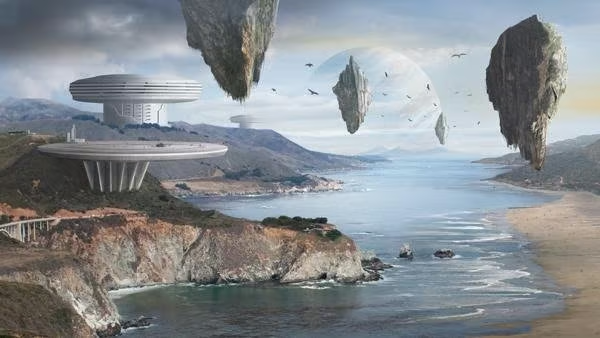
Matte painting combines various photographic elements and digital painting to create expansive, immersive environments that would be impossible or impractical to photograph.
Building Atmospheric Perspective
Create depth by adjusting contrast, color saturation, and detail as elements recede into the distance, mimicking the effects of atmospheric perspective.
Blending Multiple Sources Seamlessly
Use advanced masking techniques and adjustment layers to blend dozens of photographic elements into a cohesive whole.
Adding Lighting and Environmental Effects
Enhance realism with cast shadows, light rays, atmospheric particles, and weather effects that unify your composite environment.
14. Infrared Effect: Otherworldly Landscapes
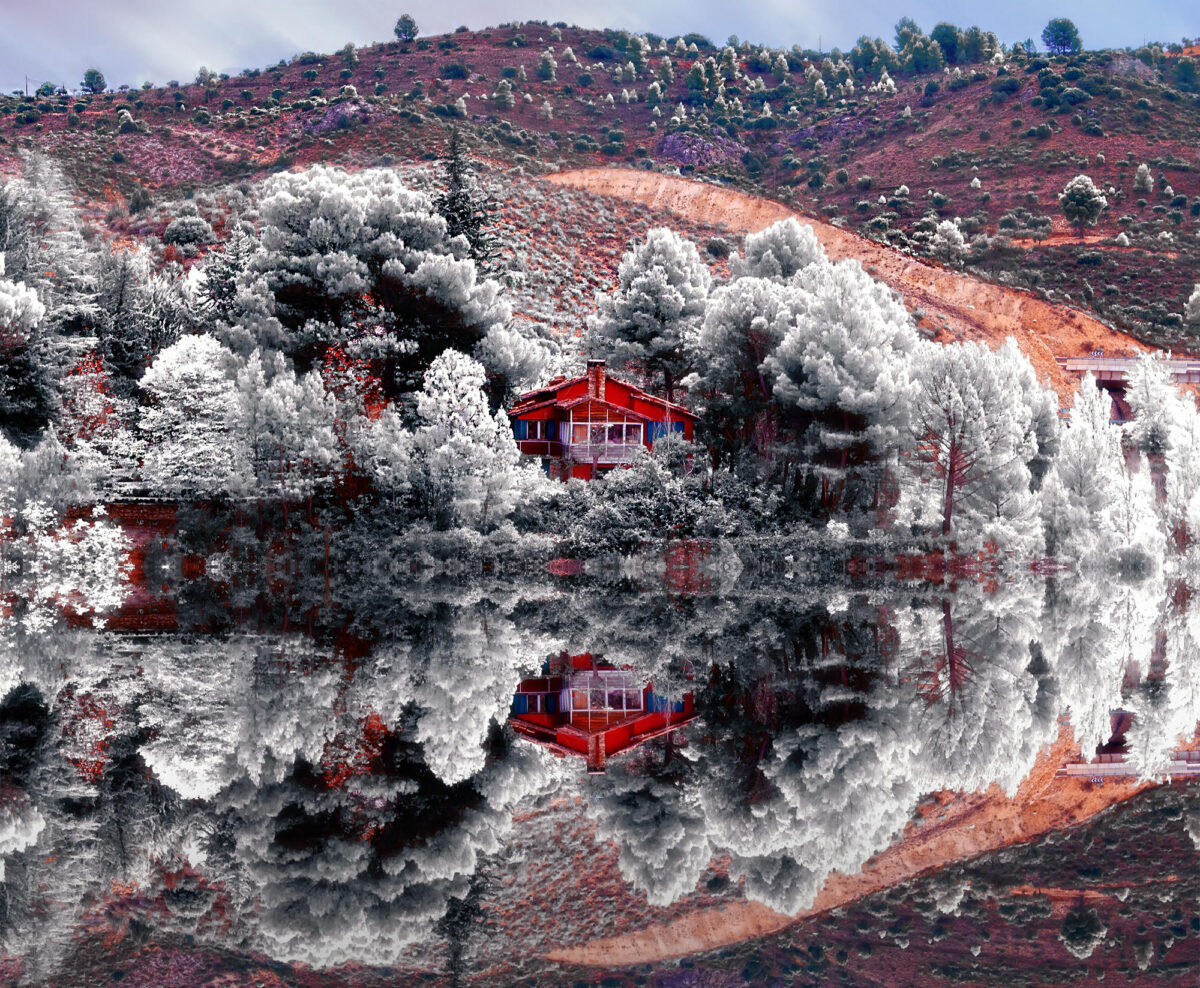
The infrared effect recreates the dreamlike quality of infrared photography, where foliage appears white or golden and skies take on deep, dramatic tones.
Channel Swapping for Base Effect
Start by swapping the red and blue channels to create the characteristic tonal shifts of infrared photography.
Selective Hue Adjustment
Use Hue/Saturation adjustment layers with precise masks to control which elements take on the infrared effect most dramatically.
Adding Halation Effects
Create the distinctive “glow” around bright objects that occurs in actual infrared photography using subtle Glow filters or Gaussian blurs on luminosity selections.
15. Collage Art: Visual Storytelling
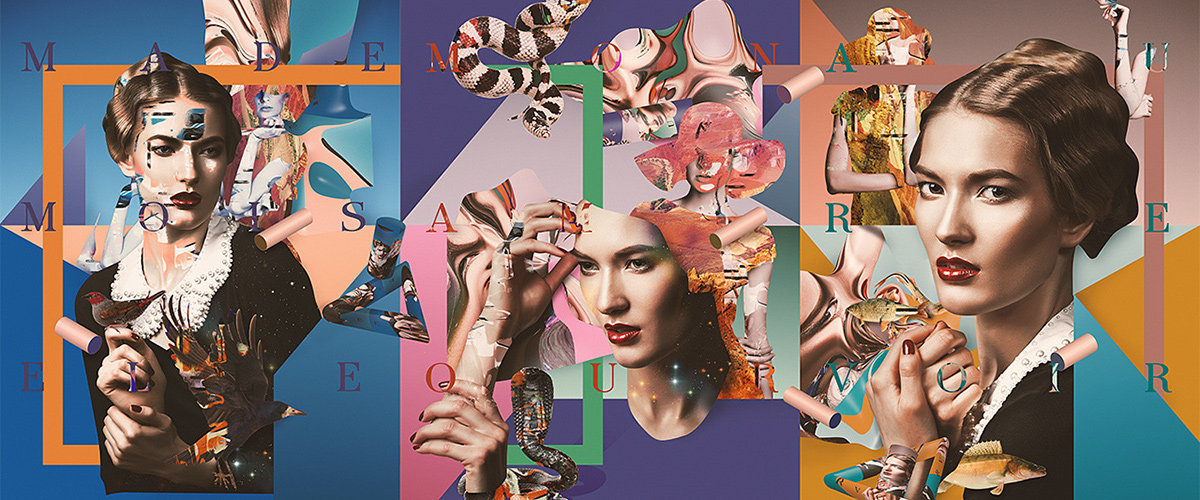
Digital collage combines disparate elements into a unified composition that can express complex ideas or narratives through visual juxtaposition.
Developing Conceptual Frameworks
Start with a clear conceptual foundation to guide your element selection and arrangement. Strong collages communicate specific themes or messages.
Working with Scale and Proportion
Deliberately manipulate the scale of elements to create visual hierarchy and unexpected relationships between objects.
Creating Unified Visual Language
Despite using diverse elements, maintain cohesion through consistent color grading, texture treatments, or stylistic approaches.
Creative Photoshop Effects for Portrait Enhancement
16. Frequency Separation: Refined Skin Retouching
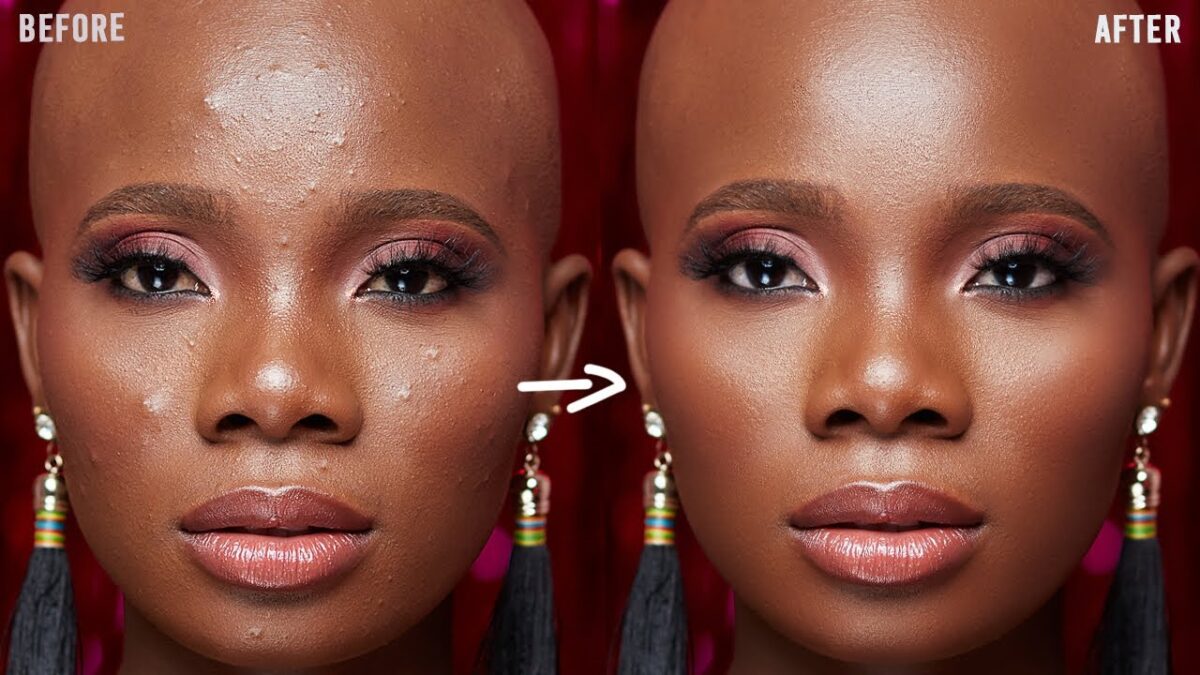
Frequency separation is a sophisticated retouching technique that separates an image into high-frequency (detail) and low-frequency (color/tone) layers, allowing for precise skin refinement without losing texture.
Understanding Frequency Fundamentals
Learn to identify which skin issues belong to the detail layer (pores, fine lines) versus the color layer (uneven tones, discoloration) for targeted correction.
Preserving Natural Skin Texture
Maintain realistic skin appearance by preserving or even enhancing appropriate texture while smoothing problematic areas.
Creating Custom Brushes for Retouching
Develop specialized brushes that mimic natural skin texture for areas where you need to reconstruct detail.
17. Dramatic Portrait Lighting: Digital Light Sculpting
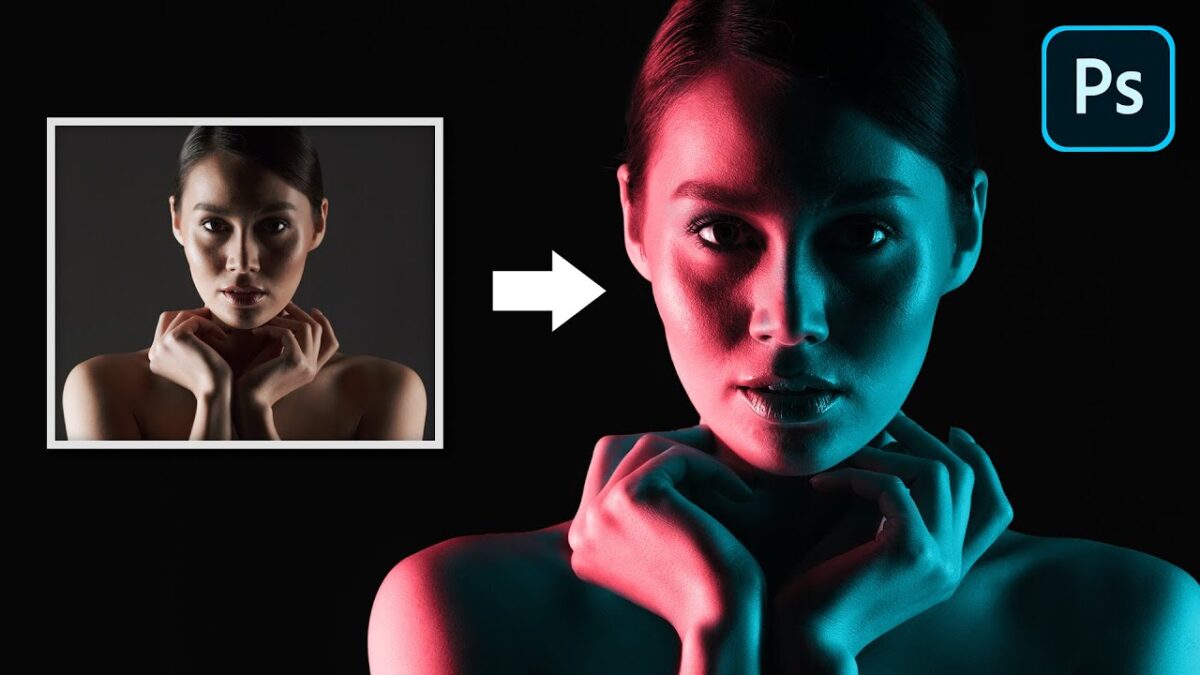
Transform flat or poorly lit portraits by digitally recreating studio lighting setups that sculpt and flatter your subjects.
Understanding Light Direction and Quality
Study classic lighting patterns (Rembrandt, butterfly, split, etc.) to recreate their characteristic shadows and highlights.
Building Multiple Light Sources
Use Dodge and Burn techniques with specialized layer setups to create main lights, fill lights, and rim lights that shape your subject.
Adding Realistic Catchlights
Create or enhance eye catchlights that match your simulated lighting setup for added depth and realism.
18. Digital Makeup Enhancement: Subtle Artistry
Digital makeup techniques allow you to enhance or completely transform a subject’s appearance with subtle control that preserves natural qualities.
Working with Color Theory
Apply color theory principles to select makeup tones that complement your subject’s complexion and the overall color palette of your image.
Building in Layers for Natural Results
Apply digital makeup in multiple semi-transparent layers, just as a makeup artist would build up product gradually for a realistic effect.
Creating Custom Texture Brushes
Develop brushes that mimic the application of different cosmetic products—from the creaminess of lipstick to the powdery finish of blush.
19. Multiple Exposure Portraits: Conceptual Identity
Multiple exposure portraits blend several images of the same subject to create conceptual representations of personality, emotion, or internal conflict.
Planning Meaningful Combinations
Consider what each pose or expression communicates before combining them. The juxtaposition should reveal something meaningful about your subject.
Creating Dynamic Compositions
Arrange your exposures to create visual flow that guides viewers through the different aspects of your subject.
Unifying with Selective Focus
Use selective focus or clarity adjustments to emphasize certain exposures over others, creating hierarchy within your composite.
20. Droste Effect: Infinite Recursion
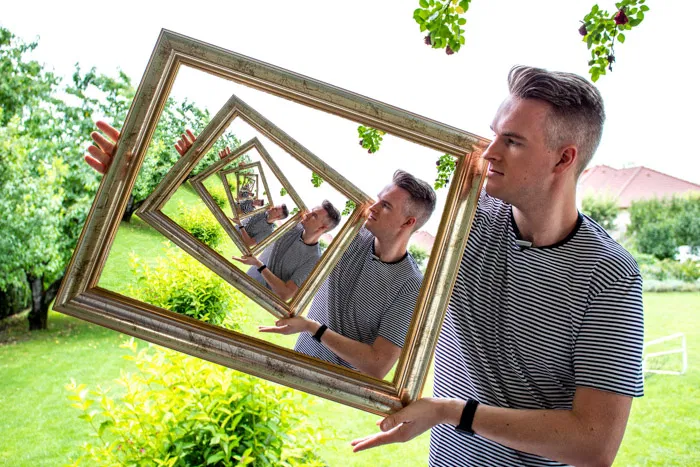
The Droste effect creates an image that contains a smaller version of itself, which in turn contains an even smaller version, theoretically continuing into infinity. This mind-bending effect creates visual intrigue and can convey concepts of self-reflection or infinite regression.
Selecting Appropriate Frames
Choose or create a frame within your image (screen, painting, mirror, etc.) where the recursion will occur.
Managing Perspective for Coherence
Maintain consistent perspective in each recursion to create the illusion of depth and continuity.
Creating Visual Interest with Variations
Add subtle changes to each recursion level to reward close inspection and add narrative elements.
Specialized Photoshop Projects for 2026
21. Text and Image Integration: Typography in Harmony
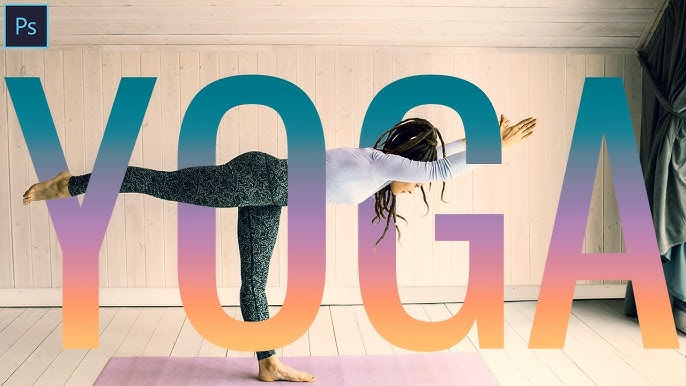
Creative text integration merges typography with imagery to create compositions where text and visuals work together as unified design elements.
Creating Text Masks and Clipping Masks
Use text as masks for images or create clipping masks that conform images to text shapes for sophisticated visual-verbal relationships.
Exploring Text Wrapping and Flow
Wrap text around objects or along paths that complement your visual elements, creating organic integration.
Building Dimension with Text Effects
Add depth to typography using lighting effects, shadows, and textures that match your image environment.
22. Conceptual Manipulations: Visual Metaphors
Conceptual manipulations use Photoshop techniques to create visual metaphors that communicate complex ideas through surreal or impossible imagery.
Developing Clear Conceptual Foundations
Start with a specific concept or message you want to convey, then identify visual elements that can represent it metaphorically.
Maintaining Visual Coherence
Even surreal compositions need internal logic. Ensure lighting, scale, and perspective remain consistent to make the impossible seem plausible.
Balancing Subtlety and Impact
Create conceptual images that invite viewers to discover meaning rather than stating it obviously—the “aha” moment of understanding creates deeper engagement.
23. Digital Ecosystem Creation: Worldbuilding
This advanced technique involves creating entire fictional environments with their own internal logic, atmospheric conditions, and inhabitants.
Establishing Environmental Consistency
Define the physical laws and conditions of your world, then ensure all elements conform to these established rules.
Building Atmospheric Depth
Create layers of atmosphere that affect light, color, and visibility throughout your scene to enhance dimensional realism.
Adding Interactive Elements
Show how elements in your environment interact with each other through shadows, reflections, or environmental effects that suggest a living ecosystem.
24. Seamless Patterns: From Simple to Complex

Create custom repeating patterns that can be used for backgrounds, textures, product design, or digital papers.
Mastering Technical Requirements
Understand the mathematics of different pattern types (basic repeats, half-drop repeats, etc.) to create perfectly seamless designs.
Developing Pattern Complexity
Build complexity through layering multiple pattern elements with varying opacity and blending modes rather than creating overly complicated base units.
Creating Pattern Collections
Develop coordinating pattern sets that share color palettes and stylistic elements while offering visual variety.
25. Documentary Enhancement: Truth and Impact
Enhance documentary images ethically to increase their emotional impact while preserving their documentary integrity.
Understanding Ethical Boundaries
Establish clear personal guidelines for what types of enhancements preserve versus distort the truth of a documentary moment.
Using Subtle Dodging and Burning
Apply traditional darkroom techniques digitally to guide viewer attention without changing the actual content of the scene.
Enhancing Story-Relevant Elements
Selectively adjust clarity, contrast, or color to emphasize elements that are most relevant to the documentary narrative.
Taking Your Photoshop Skills to the Next Level
As you work through these 25 creative Photoshop ideas, remember that true mastery comes not just from learning techniques but from developing your own creative vision. The most compelling Photoshop work emerges when technical skill serves artistic purpose.
Here are some parting thoughts to guide your creative journey:
Start with a Clear Vision
Before opening Photoshop, spend time developing a clear concept. Know what you want to communicate or express, then choose techniques that serve that vision.
Embrace Experimentation
Some of the most interesting creative breakthroughs come from unexpected combinations or “happy accidents.” Set aside time to play and experiment without pressure to produce finished work.
Build a Reference Library
Collect examples of Photoshop work that inspires you. Analyze what makes these images effective and consider how you might incorporate similar approaches into your own work.
Develop Project Workflows
For techniques you use regularly, develop standardized workflows that ensure consistent results while saving time and mental energy.
Share Your Work and Process
The feedback you receive from sharing your work can provide valuable insights and push your skills forward. Consider documenting your process to solidify your understanding and help others.
Whether you’re creating images for clients, building your portfolio, or simply exploring for personal fulfillment, these 25 creative Photoshop ideas provide pathways to expand your capabilities and express your unique creative vision.
The real power of Photoshop isn’t in the software itself—it’s in the imagination and skill of the person using it. I hope these ideas inspire you to push boundaries and create images that captivate, communicate, and connect with viewers in meaningful ways.
Good luck on your creative journey!