In this article:
- Why Deselection Matters in Your Design Workflow
- Multiple Ways to Deselect in Photoshop
- Working with Different Selection Tools
- Advanced Deselection Techniques for Professional Designers
- Common Deselection Problems and Solutions
- Streamlining Your Workflow with Deselection Shortcuts
- Deselection for Specific Design Tasks
- Selection and Deselection Beyond the Basics
- Final Thoughts on Mastering Deselection in Photoshop
Mastering Photoshop’s selection tools (see: marching ants) is absolutely essential for efficient workflow. But knowing how to deselect in Photoshop is just as important as knowing how to select in the first place.
Whether you’re fixing up a quick photo retouch or putting together a complex composite image for a client project, knowing how to properly deselect can save you enormous amounts of time and frustration.
In this comprehensive guide, I’ll share everything you need to know about deselection in Photoshop, including multiple methods, time-saving shortcuts, and professional tips that will dramatically improve your design workflow.
Why Deselection Matters in Your Design Workflow
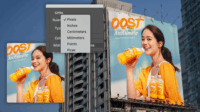
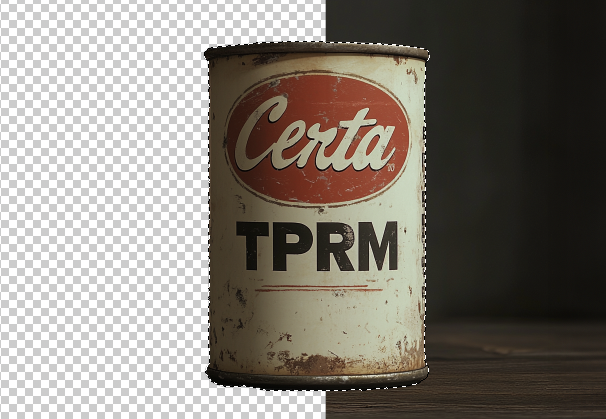
Let’s talk about why deselection is such a critical skill. When you’re working on a project in Photoshop, you’ll often need to isolate specific parts of an image for editing. Those marching ants (the animated dotted line that indicates a selection) are incredibly useful—until they’re not.
Think about it like this: you’ve meticulously selected a client’s product to remove the background, but now you need to work on the entire image again. Without knowing how to deselect, you’re stuck only being able to edit that one area.
Deselecting is your “release valve” that allows you to transition between focused editing and working on the whole canvas. It’s a fundamental skill that’s going to come up dozens of times in even a simple editing session.
Multiple Ways to Deselect in Photoshop
There’s more than one way to deselect in Photoshop, and the method you choose will depend on your personal workflow preferences and the specific task at hand. Let’s explore each approach with detailed instructions.
1. The Keyboard Shortcut Method (Fastest)
The quickest way to deselect anything in Photoshop is by using the keyboard shortcut. This is the method I personally use most often because it’s lightning fast and becomes second nature with practice.
For Windows users: Press Ctrl + D
For Mac users: Press Command + D
This keyboard shortcut works universally across all versions of Photoshop and will instantly remove any active selection. I strongly recommend committing this shortcut to muscle memory—it’s one you’ll use constantly.
2. Using the Menu Option
If you prefer using the menu or are still getting familiar with Photoshop, you can deselect through the main menu:
1. Go to the top menu bar and click on “Select”
2. From the dropdown menu, click “Deselect”
While this method takes longer than the keyboard shortcut, it’s helpful when you’re first learning Photoshop or if you occasionally forget the shortcut.
3. Right-Click Method
Another quick way to deselect is to right-click anywhere within your canvas and select “Deselect” from the contextual menu that appears.
This approach is particularly useful when you’re already using your mouse or graphics tablet and don’t want to switch to the keyboard.
4. Click Outside Method (For Certain Tools)
When you’re using certain selection tools like the Marquee tools (Rectangular or Elliptical) or the Lasso tools, you can often deselect by simply clicking once anywhere outside your selection on the canvas.
This method works well when you’re in the middle of making selections and want a quick way to start over, but be aware it doesn’t work with all selection tools or in all circumstances.
Working with Different Selection Tools
Now let’s look at how deselection works with some of Photoshop’s most common selection tools. Each has its own nuances that are worth understanding.
Deselecting with the Marquee Tools
The Rectangular and Elliptical Marquee tools are some of Photoshop’s most fundamental selection tools. When you’ve made a selection with either of these:
To deselect completely: Use Ctrl+D (Windows) or Command+D (Mac), or click outside the selection area
To subtract from the selection: Hold Alt (Windows) or Option (Mac) while making a new selection over the area you want to remove
Deselecting with the Lasso Tools
The Lasso, Polygonal Lasso, and Magnetic Lasso tools allow for more freeform selections. When working with these tools:
To deselect completely: Use Ctrl+D (Windows) or Command+D (Mac), or in many cases, simply click outside the selection
To subtract from a lasso selection: Hold Alt (Windows) or Option (Mac) while drawing a new selection over the area you want to remove
Deselecting with the Magic Wand and Quick Selection Tools
These tools select pixels based on tone and color. They work a bit differently:
To deselect completely: Use Ctrl+D (Windows) or Command+D (Mac)
To subtract from the selection: With the Magic Wand, hold Alt (Windows) or Option (Mac) and click on the area you want to remove. With the Quick Selection tool, hold Alt/Option and drag over areas to subtract them.
Deselecting with the Select Subject or Select and Mask Features
For these more advanced selection features:
To exit Select and Mask without keeping changes: Click Cancel
To apply changes and then deselect: Click OK to apply, then use Ctrl+D/Command+D to deselect
Advanced Deselection Techniques for Professional Designers
Once you’ve mastered the basics, these advanced techniques will take your Photoshop skills to the next level and make your workflow even more efficient.
Reselecting After a Deselection
Have you ever deselected something and immediately regretted it? Photoshop has you covered. You can quickly reselect your last selection by:
1. Going to Select > Reselect
2. Or using the keyboard shortcut: Shift+Ctrl+D (Windows) or Shift+Command+D (Mac)
This feature has saved me countless hours of work when I’ve accidentally deselected a complex selection.
Saving Selections for Later Use
For complex projects where you might need to use the same selection multiple times, consider saving your selection:
1. With your selection active, go to Select > Save Selection
2. Name your selection and click OK
3. To load this selection later, go to Select > Load Selection and choose your saved selection
This is incredibly useful for client projects where you need to maintain consistency across multiple editing sessions.
Using Layer Masks Instead of Deselecting
Sometimes, rather than deselecting, a better workflow is to convert your selection to a layer mask:
1. Make your selection
2. Click the “Add Layer Mask” button at the bottom of the Layers panel
This approach lets you preserve your selection as a mask that you can continue to refine, while still being able to work on other parts of your image.
Quick Mask Mode for Temporary Deselection
Quick Mask mode is a powerful way to temporarily convert your selection into a mask that you can edit with painting tools:
1. Make a selection
2. Press Q to enter Quick Mask mode (your selection appears as a colored overlay)
3. Edit the mask using Brush tools
4. Press Q again to exit Quick Mask and convert back to a selection
This technique is incredibly useful for complex selections where you need precise control.
Common Deselection Problems and Solutions
Even experienced designers run into deselection issues from time to time. Here are solutions to some common problems:
Can’t Deselect No Matter What
If you’re trying to deselect but nothing is happening, check for these issues:
You’re in a special mode: Make sure you’re not in Quick Mask mode or Select and Mask workspace
There’s an active selection tool: Sometimes having a selection tool active can interfere with deselection. Try switching to a different tool first, then deselect
Photoshop is lagging: With very large files, Photoshop might be processing your command but taking time to show the result. Be patient or try saving and reopening the file
Parts of Selection Remain After Deselecting
If you notice that parts of your selection remain after attempting to deselect:
Check for multiple selections: You might have selections on different layers or channels
Verify layer masks: What looks like a selection might actually be a layer mask effect
Reset selection tools: In the options bar, click “New Selection” mode to ensure you’re not in “Add to Selection” mode
Accidental Deselections
If you’re accidentally deselecting when you don’t mean to:
Use History panel: Go to Window > History and click back to a state before the deselection
Get in the habit of saving selections: For important selections, use Select > Save Selection so you can easily recover them
Streamlining Your Workflow with Deselection Shortcuts
As your Photoshop skills advance, incorporating these workflow tips will save you significant time:
Using Multiple Selection/Deselection Functions Together
Combine selection and deselection operations for maximum efficiency:
Partial deselection: Hold Alt/Option while using selection tools to remove parts of a selection rather than deselecting entirely
Inverse selection: After deselecting one area, use Select > Inverse (Shift+Ctrl/Command+I) to select everything else
Layer-based selection: Use Ctrl/Command+click on a layer thumbnail to load that layer’s transparency as a selection
Customizing Your Workspace for Faster Deselection
Optimize your Photoshop workspace for quicker access to deselection functions:
Create a custom keyboard shortcut: If you find Ctrl/Command+D awkward, you can create your own shortcut in Edit > Keyboard Shortcuts
Add Deselect to a custom toolbar: In Photoshop’s Edit > Toolbar, you can create a custom toolbar with your most-used commands, including Deselect
Selection and Deselection Best Practices
Follow these best practices for a more efficient workflow:
Make precise initial selections: The more accurate your initial selection, the less you’ll need to toggle between selecting and deselecting
Work with layers intelligently: Often it’s better to place elements on separate layers than to use complex selection/deselection on a single layer
Use adjustment layers with masks: Rather than selecting, adjusting, and deselecting repeatedly, use adjustment layers with masks for non-destructive editing
Deselection for Specific Design Tasks
Different design tasks require different approaches to selection and deselection. Here are strategies for common scenarios:
Photo Retouching
When retouching photos for clients:
Use the Clone Stamp tool with temporary selections: Make a selection, use the Clone Stamp to fix issues, then deselect to check your work in context
Employ frequent deselect/reselect cycles: Constantly toggle between viewing your retouching in isolation and seeing how it affects the whole image
Digital Illustrations
For illustration work:
Save selections for recurring elements: If your illustration has repeating elements that need consistent treatment, save these selections
Use Quick Mask for organic selections: When creating organic shapes, Quick Mask mode offers more natural control than standard selection tools
Web and UI Design
When designing for digital interfaces:
Leverage Shape layers instead of selections: For UI elements, Shape layers often provide better flexibility than pixel-based selections
Use Smart Objects with vector selections: This approach maintains crisp edges at any resolution while still allowing you to deselect and work on other elements
Selection and Deselection Beyond the Basics
For those looking to truly master Photoshop, these advanced concepts will elevate your selection/deselection skills:
Working with Channels for Complex Selections
The Channels panel offers powerful selection capabilities:
1. Identify a channel with good contrast for the area you want to select
2. Duplicate that channel
3. Adjust the contrast to isolate your subject
4. Ctrl/Command+click the channel thumbnail to load it as a selection
5. Return to RGB view and use your selection
This approach is excellent for selecting hair or other complex edges that standard selection tools struggle with.
The Power of Calculated Selections
For technical projects, Photoshop’s calculated selections can be invaluable:
1. Go to Select > Color Range for selections based on color values
2. Use Select > Focus Area to select in-focus portions of an image
3. Try Select > Subject to automatically detect and select the main subject
These tools often create selections that would be extremely time-consuming to make manually.
Selection and Deselection with Actions and Scripts
For repetitive tasks, automate your selection/deselection workflow:
1. Record common selection/deselection sequences as Actions
2. Assign function keys to these Actions
3. For complex operations, consider learning to write Photoshop scripts
Automation can transform tasks that would take hours into operations that complete in seconds.
Final Thoughts on Mastering Deselection in Photoshop
Becoming proficient with selection and deselection in Photoshop is about more than just knowing the keyboard shortcuts—it’s about developing an efficient workflow that meshes with your creative process.
The designers I’ve coached over the years who have the smoothest workflows are the ones who have mastered these fundamentals and integrated them so deeply that they barely have to think about the technical aspects anymore. This frees their creative mind to focus on what really matters: creating amazing designs for their clients.
Remember that practice is key. The more you work with selections and deselections, the more intuitive the process will become. Start with the basic methods we’ve covered, then gradually incorporate the more advanced techniques as your confidence grows.
If you’re serious about improving your design workflow efficiency, I also recommend exploring how layer-based workflows can reduce your reliance on complex selection operations altogether. Sometimes the most efficient way to handle selections is to structure your document so that you need fewer of them in the first place.
Mastering deselection in Photoshop is just one small step on your journey to becoming a more efficient, effective designer. But it’s these fundamentals that will ultimately allow you to create better work, deliver projects more quickly, and reduce the technical friction that can sometimes get in the way of your creative vision.
Now that you’re equipped with these techniques, your next client project should flow more smoothly than ever before.