In this article:
- Why Proper Cropping Matters
- The Basic Crop in Photoshop: Step-by-Step
- Working with the Options Bar
- Advanced Cropping Techniques
- Common Cropping Scenarios and Solutions
- Keyboard Shortcuts to Speed Up Your Workflow
- Troubleshooting Common Cropping Issues
- Best Practices for Better Cropping
- Cropping as Part of Your Overall Workflow
- Wrapping Up
If you’ve ever worked with images in Photoshop, you know that cropping is one of the most fundamental and frequently used editing techniques. Whether you’re a professional photographer preparing client deliverables, a graphic designer creating assets for a project, or just someone trying to improve family photos, knowing how to crop effectively in Photoshop can take your images from good to great.
And while cropping might seem like a simple task (and in many ways, it is), Adobe has packed an impressive array of options into Photoshop’s cropping tools that many users never discover.
In this comprehensive guide, I’ll walk you through everything you need to know about cropping in Photoshop—from the basics to advanced techniques that will save you time and help you achieve more professional results.
Why Proper Cropping Matters
Before diving into the how-to, let’s quickly talk about why cropping is so important:
Good cropping can dramatically improve composition, remove distracting elements from your images, change the aspect ratio to fit specific requirements, and help focus the viewer’s attention on what matters most in your photo.
In fact, I’ve seen countless images that went from mediocre to stunning with nothing more than thoughtful cropping. It’s arguably the most powerful tool in your basic editing arsenal.
The Basic Crop in Photoshop: Step-by-Step
Let’s start with the fundamentals. Here’s how to perform a basic crop in Photoshop:
1. Select the Crop Tool
First, open your image in Photoshop and select the Crop Tool from the Tools panel on the left side of your screen. You can also press the keyboard shortcut C to activate it instantly. You’ll notice your cursor changes to the crop icon, and a crop border appears around your image.
2. Adjust the Crop Border
Click and drag any of the corner or edge handles to reshape the crop border to your desired dimensions. As you drag, you’ll see the area outside the crop border becomes shaded—this is the area that will be removed when you complete the crop.
3. Reposition Your Image
If you want to adjust which part of the image appears within your crop border, simply click inside the border and drag to reposition the image. This allows you to fine-tune exactly what will remain after cropping.
4. Complete the Crop
When you’re satisfied with your selection, you can finalize the crop in several ways:
- Press Enter (Windows) or Return (macOS)
- Click the checkmark (✓) in the Options bar at the top of the screen
- Double-click inside the crop border
And voilà! Your image is now cropped to your specifications.
Working with the Options Bar
When the Crop Tool is active, the Options bar at the top of your Photoshop window offers a wealth of additional controls that many users overlook. Let’s explore each of these powerful options:
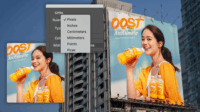
Aspect Ratio Settings
By default, the crop tool is set to “Unconstrained,” allowing you to freely adjust the crop border to any dimensions. However, if you need your image to have specific proportions, you can set an aspect ratio from the dropdown menu in the Options bar.
Common preset ratios include:
- 1:1 – Perfect square (ideal for Instagram)
- 16:9 – Widescreen video format
- 4:5 – Vertical Instagram format
- 8.5 x 11 – Letter size document
- A4, A3, etc. – Standard paper sizes
You can also set a custom ratio by selecting “W x H x Resolution” from the dropdown and entering your own values.
Width, Height, and Resolution
If you need your cropped image to have specific pixel dimensions or a particular resolution (which is common for web design or print projects), you can enter those values directly in the Options bar fields.
For example, if you need an image that’s exactly 1200px wide by 800px high, you would:
- Select “W x H x Resolution” from the dropdown
- Enter “1200 px” in the width field
- Enter “800 px” in the height field
- Enter your desired resolution (typically 72 ppi for web or 300 ppi for print)
When you apply the crop, Photoshop will automatically resize your image to these exact specifications.
The Straighten Tool
One of my favorite features hidden within the Crop Tool is the Straighten Tool. Found in the Options bar, this tool allows you to quickly fix a crooked horizon or align your image to any line.
To use it:
- With the Crop Tool active, click the Straighten Tool icon in the Options bar (it looks like a level)
- Click and drag along a line in your image that should be horizontal or vertical (like a horizon)
- Release the mouse button, and Photoshop will automatically rotate your crop to straighten that line
This is a massive time-saver compared to manually rotating your image!
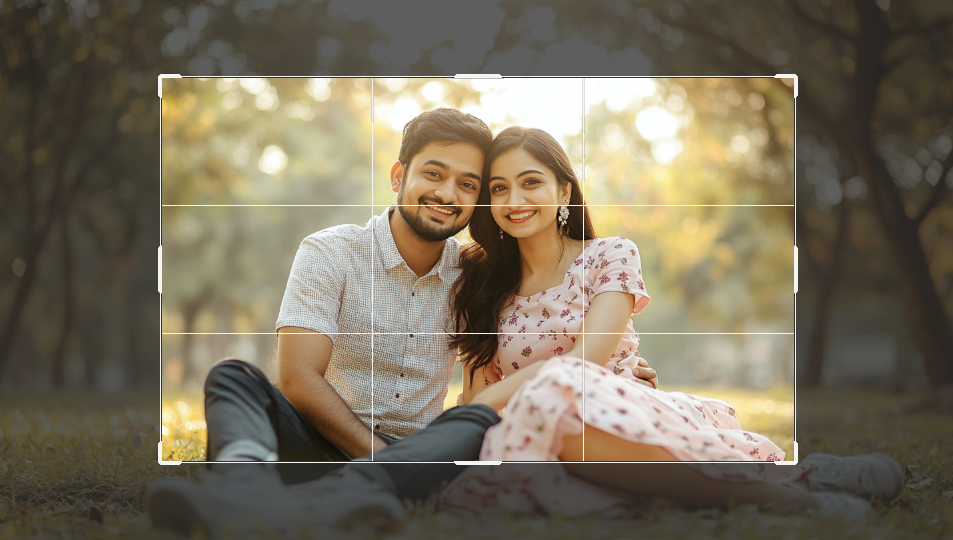
Overlay Guides
Photoshop offers several compositional guides that can help you make better cropping decisions. You can cycle through these by pressing O on your keyboard while the Crop Tool is active, or by selecting them from the “View” dropdown in the Options bar.
The available overlay guides include:
- Rule of Thirds – Divides your image into nine equal parts
- Grid – Shows a customizable grid
- Golden Ratio – Based on the mathematical ratio found throughout nature
- Golden Spiral – A spiral based on the golden ratio
- Diagonal – Shows diagonal lines from corners
- Triangle – Creates triangular composition guides
These guides can significantly improve your composition decisions when cropping.
Advanced Cropping Techniques
Now that we’ve covered the basics, let’s explore some more advanced cropping techniques that can take your Photoshop skills to the next level.
Non-Destructive Cropping
By default, modern versions of Photoshop perform non-destructive crops, meaning the cropped areas aren’t permanently deleted but simply hidden. This gives you the flexibility to adjust your crop later if needed.
To ensure you’re using non-destructive cropping, check that the “Delete Cropped Pixels” option in the Options bar is unchecked. This allows you to:
- Crop your image
- Continue working on other edits
- Come back later and adjust the crop if needed by selecting the Crop Tool again
This workflow is especially valuable for client work where revisions might be requested.
Content-Aware Crop
One of Photoshop’s most impressive features is Content-Aware technology, which intelligently fills in areas based on surrounding content. This can be combined with cropping through the “Content-Aware” option in the Options bar.
When enabled, this option allows you to extend your crop border beyond the original image boundaries. Photoshop will then attempt to fill in these new areas intelligently.
This is particularly useful when:
- You need to change an image’s aspect ratio but don’t want to lose important content
- You’re trying to straighten an image and don’t want empty corners
- You need a bit more room around your subject
While not perfect for every situation, Content-Aware Crop can sometimes work like magic!
Perspective Crop
If you’re working with an image that has perspective distortion (like a building photographed from below), the Perspective Crop Tool can be a lifesaver.
You can access this specialized crop tool by clicking and holding on the Crop Tool icon in the Tools panel, then selecting “Perspective Crop Tool” from the flyout menu.
With this tool, you can draw a crop box that doesn’t need to be rectangular in your image—you can place each corner independently. When you apply the crop, Photoshop will straighten the perspective, making your cropped result rectangular.
This is incredibly useful for architectural photography, product photos, or any situation where you need to correct perspective distortion while cropping.
Cropping with Layer Masks
While not technically using the Crop Tool, masking offers an alternative way to “crop” images that provides maximum flexibility:
- Add a layer mask to your image layer by clicking the “Add Layer Mask” button at the bottom of the Layers panel
- Select the Rectangular Marquee Tool (M)
- Draw a selection around the area you want to keep
- Invert your selection (Select > Inverse or Shift+Ctrl+I / Shift+Cmd+I)
- Fill the selection with black on your mask (Edit > Fill > Black)
This approach lets you “crop” your image while maintaining complete editability—you can adjust the mask at any time, or even disable it entirely to restore your full image.
Common Cropping Scenarios and Solutions
Let’s look at some specific situations where cropping is essential and how to approach each one:
Cropping for Social Media
Different social platforms require different image dimensions. Here’s how to quickly crop for the most common platforms:
Instagram Feed
For Instagram feed posts, you have three main options:
- Square (1:1) – Select 1:1 from the aspect ratio dropdown
- Landscape (1.91:1) – Set a custom aspect ratio of 1.91:1
- Portrait (4:5) – Select 4:5 from the aspect ratio dropdown
Facebook Cover Photos
For Facebook cover photos, use a 16:9 aspect ratio and be mindful that the image displays differently on mobile versus desktop. I recommend keeping important elements toward the center of the image.
Twitter Images
Twitter displays in-stream images at a 16:9 ratio, so setting this aspect ratio when cropping will ensure your images display fully without awkward cropping by the platform.
Cropping for Print
When preparing images for print, remember these key points:
- Set your resolution to 300 ppi in the Options bar
- Use standard print sizes (4×6, 5×7, 8×10, etc.) from the aspect ratio dropdown
- Add a small amount of bleed area if your image will go to the edge of the page
Product Photography Cropping
For e-commerce and product photography:
- Maintain consistent aspect ratios across all product images
- Consider using square crops (1:1) for catalog-style layouts
- Leave appropriate breathing room around the product
Keyboard Shortcuts to Speed Up Your Workflow
Mastering these keyboard shortcuts will dramatically speed up your cropping workflow:
- C – Activate the Crop Tool
- Enter/Return – Complete the crop
- Esc – Cancel the crop operation
- X – Swap the width and height values (when using a fixed ratio)
- O – Cycle through overlay guides
- Shift+O – Change overlay orientation
- H – Hide/show cropped area (toggle between normal and shielded views)
- I – Reset the crop border to encompass the entire image
Troubleshooting Common Cropping Issues
Even with a seemingly simple tool like crop, you might encounter some challenges. Here are solutions to common problems:
Image Quality After Cropping
If you notice your image quality degrading after cropping, especially when using specific dimensions, check that:
- You’re not drastically enlarging a small area of your original image
- Your resolution settings are appropriate for your intended use
- You’re using “Bicubic Automatic” or “Bicubic Sharper” as your resampling method (in the Options bar)
Can’t Move Image Within Crop Border
If you’re unable to reposition your image within the crop border, make sure that:
- You’re clicking inside the crop border (not on a handle)
- The “Delete Cropped Pixels” option is unchecked in the Options bar
Crop Tool Behaving Strangely
If the Crop Tool isn’t working as expected, try:
- Resetting the tool by right-clicking the Crop Tool icon in the Tools panel and selecting “Reset Tool”
- Checking if you accidentally have Content-Aware or Perspective Crop options enabled
Best Practices for Better Cropping
After years of working with images professionally, I’ve developed these best practices for effective cropping:
Consider Your Subject
Always prioritize your main subject when cropping. Ask yourself:
- Is my subject properly framed?
- Have I removed distracting elements?
- Does this crop tell the story I want to tell?
Mind the Details
Small details can make or break a crop:
- Watch for accidentally cut-off limbs or objects at the edges
- Be mindful of how lines lead the eye through your composition
- Pay attention to how negative space works in your cropped image
Save Multiple Versions
Especially when working professionally, consider saving multiple crop versions of important images:
- Original uncropped version
- Primary crop for your main purpose
- Alternative crops for different uses (social, print, etc.)
Cropping as Part of Your Overall Workflow
While we’ve focused on cropping in isolation, it’s worth considering where cropping fits in your overall editing workflow:
- Early-stage cropping: A rough crop to focus on your subject before detailed editing
- Mid-process adjustments: Refining your crop as other edits change the visual balance
- Final-stage precision: Fine-tuning your crop right before export for delivery
I personally find that a rough crop early in my workflow helps me focus my other adjustments, but I always revisit and refine the crop before finalizing an image.
Wrapping Up
Cropping might seem like the simplest aspect of image editing, but as we’ve seen, Photoshop offers an impressive array of options that can elevate this basic task to a powerful editing technique.
Whether you’re just starting out or have been using Photoshop for years, I hope this guide has shown you some new ways to approach cropping that will improve your images and streamline your workflow.
Remember that great cropping isn’t just about removing unwanted parts of an image—it’s about intentionally framing your subject to create the strongest possible visual message. Master this fundamental skill, and you’ll see improvements across all your photographic and design work.
Happy cropping!
Preston is the founder of Millo where he and his team have been helping designers boost their skills and build successful creative businesses for over a decade. For more Photoshop tips and design advice, check out our other tutorials and resources.