In this article:
- Understanding Anime Art Style Fundamentals
- Essential Photoshop Setup for Anime Drawing
- Creating Anime-Style Linework
- Mastering Anime Coloring Techniques
- Advanced Anime Effects and Techniques
- Creating Complete Anime Scenes
- Finalizing and Optimizing Your Anime Artwork
- Turning Your Anime Art Skills Into Client Work
- Wrapping Up and Next Steps
I’ve seen countless designers struggle with creating authentic anime-style artwork in Photoshop. Whether you’re a seasoned designer looking to expand your skillset or a newcomer drawn to the vibrant world of anime aesthetics, mastering these techniques can significantly expand your creative capabilities and client offerings.
Unlike many tutorials that simply scratch the surface, I’m going to walk you through the complete process—from basic concepts to advanced techniques that will truly elevate your anime-inspired designs. By the end of this comprehensive guide, you’ll have all the tools you need to create stunning anime artwork that stands out in your portfolio and attracts the right kind of clients.
Let’s dive in!
Understanding Anime Art Style Fundamentals
Before we jump into Photoshop techniques, it’s crucial to understand what makes anime artwork unique. This foundation will inform every creative decision you make throughout your design process.
Anime art isn’t just about big eyes and colorful hair—it’s a distinctive artistic approach with its own set of principles and aesthetic considerations. While there’s tremendous variety within the genre, most anime styles share certain characteristics:
Core Elements of Anime Style
The most recognizable elements of anime style include simplified facial features, exaggerated expressions, distinctive eye shapes, and unique color palettes. Understanding these elements isn’t just about replicating them—it’s about knowing when and how to apply them in your own designs.
Eyes are particularly important in anime art—they’re larger than realistic proportions and often feature reflective highlights that convey emotion and character. Hair typically defies physics, with distinctive shapes and sometimes impossible colors. Characters often have simplified noses and mouths that change dramatically with expression.
While western cartoons might emphasize bouncy, rounded forms, anime often balances stylization with a hint of realism, particularly in clothing folds, environmental details, and lighting effects.
Essential Photoshop Setup for Anime Drawing
Setting up your Photoshop workspace properly is like organizing your physical studio—it can dramatically improve your workflow and creative output. Here’s how to optimize your setup specifically for anime artwork:
Creating Your Workspace
Start by configuring a workspace that puts your most-used tools at your fingertips. Navigate to Window > Workspace > New Workspace and create a custom setup that includes:
- Brushes panel (essential for linework and coloring)
- Layers panel (you’ll be using lots of layers)
- Color panel and swatches (for your custom anime color palettes)
- Navigator (for easy zooming and moving around detailed illustrations)
Position these panels where they’re most comfortable for your workflow. Remember, efficiency in your setup translates directly to more fluid creative output.
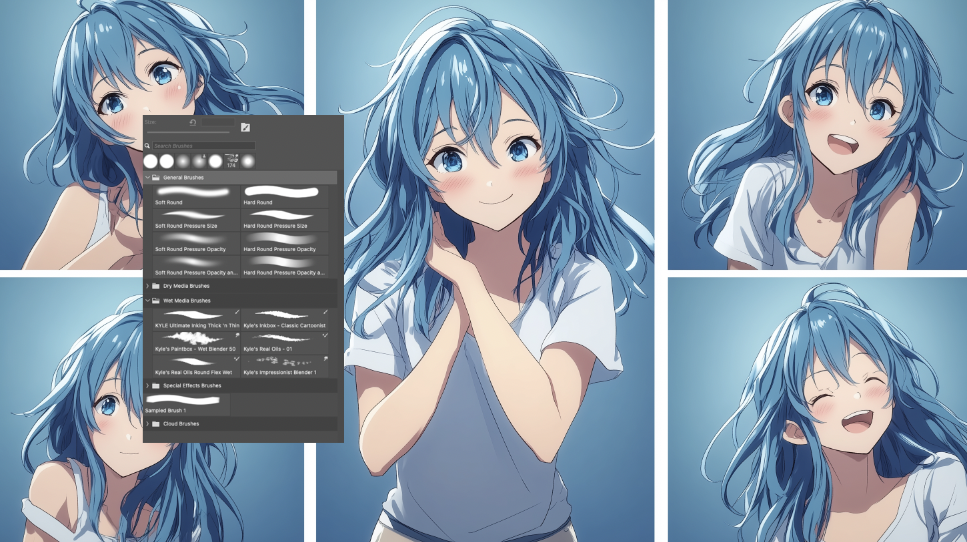
Brush Settings for Anime Artwork
The right brushes make all the difference when creating anime-style art. While Photoshop’s default brushes are versatile, you’ll want to customize them for anime linework and coloring.
For linework, create a brush with these settings:
- Size: Start with a 5-10px brush, adjustable as needed
- Hardness: 90-100% for clean lines
- Pressure sensitivity: Enabled (if using a drawing tablet)
- Shape dynamics: Set size jitter to pen pressure
- Transfer: Set opacity jitter to pen pressure (for varied line weight)
For coloring, create softer brushes with:
- Hardness: 0-30% for smooth color transitions
- Flow: Around 70-80% for controlled color application
- Opacity: Varies based on your technique, but start around 60-70%
Consider creating brush presets for different aspects of anime drawing: one for outlines, another for flat coloring, and others for shading, highlights, and special effects.
Custom Canvas Setup
When creating a new document, use these settings for optimal results:
- Resolution: 300 DPI minimum (for print-quality work)
- Color mode: RGB
- Bit depth: 8-bit is sufficient for most work
- Background: White or transparent, depending on your preference
Working at a high resolution from the start ensures your artwork remains crisp, even when you need to scale it up for different applications—a crucial consideration when creating portfolio-worthy anime illustrations.
Creating Anime-Style Linework
Clean, expressive linework is the backbone of anime art. Unlike western cartoon styles, anime linework often varies in weight and exhibits a certain flowing quality that gives characters their distinctive look.
Setting Up Your Line Art Layer
Create a new layer specifically for your linework. This separation is crucial for the anime coloring process that will come later.
Pro tip: Name your layers as you go! Something as simple as “Linework” or “Main Lines” will save you countless headaches as your file gets more complex.
Sketching Techniques
Before committing to final lines, create a rough sketch on a separate layer. Set this layer’s opacity to around 30% to use as a guide.
When sketching anime characters, focus on:
- Basic head shapes (typically more oval than circular)
- Eye placement (usually larger and higher on the face than realistic proportions)
- Simplified body proportions (often 7-8 head heights for a full body)
Use quick, loose strokes at this stage—perfection isn’t the goal yet.
Creating Clean Linework
Once your sketch is complete, create a new layer for your final linework. With your custom linework brush selected, trace over your sketch with deliberate, confident strokes.
For authentic anime lines:
- Vary your line weight—thicker for contours, thinner for details
- Use tapering lines for a natural, flowing look
- Keep facial features simplified but expressive
- Pay special attention to hair lines—they should flow in logical clumps
Remember that anime linework isn’t about absolute precision—it’s about capturing character and emotion through simplified but purposeful strokes.
Mastering Anime Coloring Techniques
Coloring is where your anime artwork really comes to life. The distinctive flat color with strategic shading approach gives anime its immediately recognizable look.
Flat Color Application
After completing your linework, create a new layer beneath it for your base colors. This layer separation ensures your lines remain crisp throughout the coloring process.
To apply flat colors efficiently:
- Use the Magic Wand tool to select areas within your linework
- Set tolerance to around 15-20 to avoid selecting unwanted areas
- Expand your selection by 1-2 pixels to prevent gaps between colors and lines
- Fill selected areas with your chosen colors using the Paint Bucket tool
For larger areas like backgrounds, use the Brush tool with a hard edge to apply flat color quickly.
Creating Custom Anime Color Palettes
Anime artwork typically uses distinctive color palettes that balance vibrancy with harmony. Create custom color swatches for your character’s skin, hair, clothing, and accessories.
For a cohesive look, consider:
- Using a limited color palette (5-7 main colors) for each character
- Creating color variations for shadows and highlights in advance
- Selecting colors that reflect the character’s personality and story
Save these custom palettes using the Swatches panel for future use, which is especially helpful when working on multi-character compositions or series.
Cell Shading Techniques
Cell shading (or cel shading) is the hallmark of anime coloring, creating that distinctive flat-yet-dimensional look. To achieve this effect:
- Create a new layer above your flat colors
- Set this layer to Multiply blend mode
- Use a soft brush with low opacity (20-30%) to add shadows
- Focus shadows on logical areas based on your light source
For an even more authentic anime look, create hard-edged shadows by:
- Making selections of shadow areas using the Lasso tool
- Filling these areas with a darker version of your base color
- Adding a very slight (1-2px) Gaussian blur to soften edges slightly
This technique creates the characteristic “cell-shaded” look while maintaining the stylized, non-realistic aesthetic of anime.

Advanced Anime Effects and Techniques
Once you’ve mastered the basics, these advanced techniques will elevate your anime artwork from good to exceptional.
Creating Anime-Style Hair
Hair is one of the most distinctive elements in anime design. To create dynamic, flowing anime hair:
- Draw the basic hair shape as several large “clumps” rather than individual strands
- Create a base layer of flat color
- Add a shadow layer (set to Multiply) focusing on underneath areas
- Create a highlight layer (set to Screen or Overlay) for the upper surfaces
- Add a few individual strands for detail using a thin, tapered brush
For extra dimension, add a subtle rim light along the edges of the hair clumps where light would naturally hit.
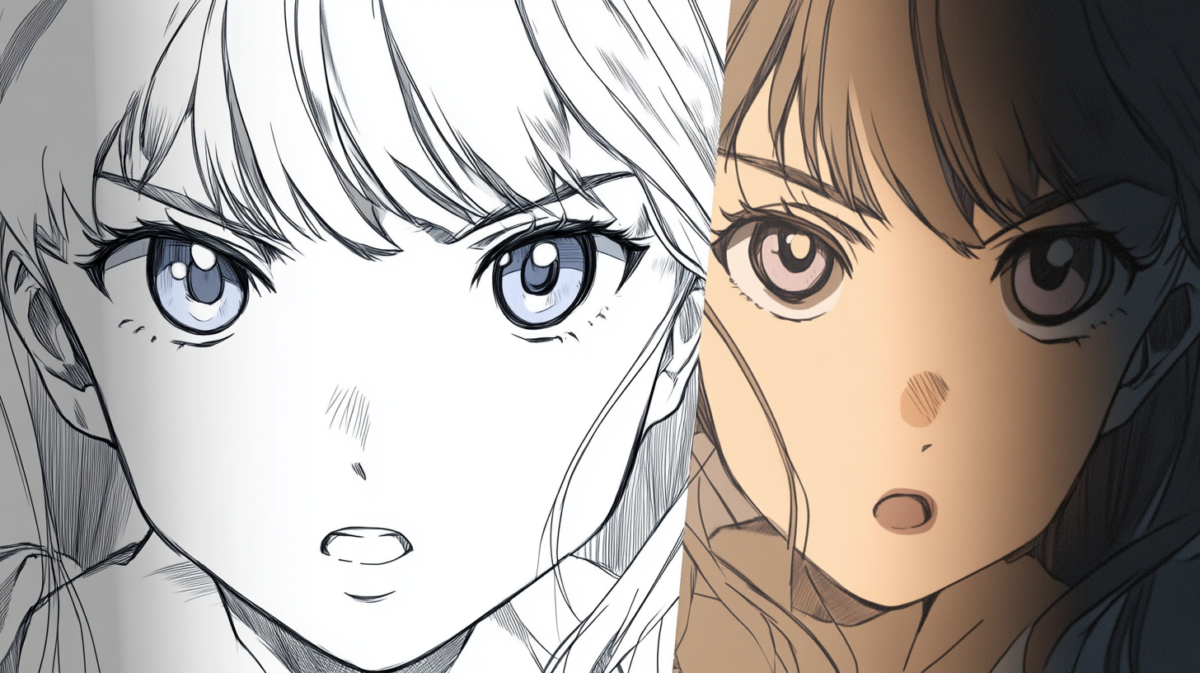
Anime Eyes and Expressions
Eyes are the soul of anime characters. Create captivating anime eyes with these steps:
- Draw the basic eye shape with upper and lower lids
- Add the iris and pupil (typically larger than realistic proportions)
- Create multiple highlight spots (usually 2-3) using white with varying opacity
- Add color variations within the iris for depth
- Include eyelashes—simplified for male characters, more pronounced for female characters
For expressive anime faces, create a library of common expressions (surprise, anger, joy, sadness) that you can reference and adapt for different characters.
Special Effects: Speed Lines and Impact Frames
Dynamic action is a cornerstone of anime art. Add movement and impact with these techniques:
Speed Lines
Create a new layer and use the Line tool with a thin, hard brush to draw parallel lines in the direction of movement. Vary the opacity and thickness to create depth. For radial speed lines (emanating from a central point), use the Polar Coordinates filter.
Impact Frames
For dramatic moments, create impact frames with:
- Radial or directional blur to suggest force
- Bright, contrasting colors against the background
- Sharp, angular shapes radiating from the impact point
These effects, when used judiciously, can transform static illustrations into dynamic scenes that capture the energy anime is known for.
Creating Complete Anime Scenes
Moving beyond character design to complete scenes requires attention to composition, background design, and integration.
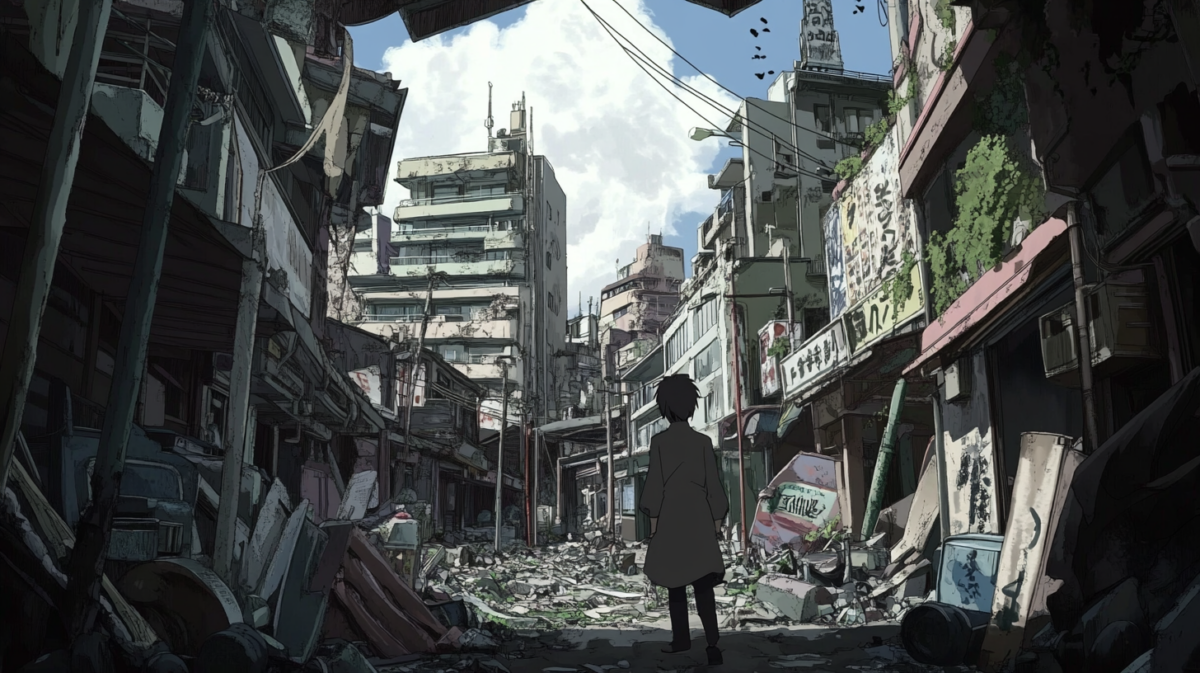
Background Design for Anime
Anime backgrounds often balance stylization with surprising detail. For effective backgrounds:
- Create backgrounds on separate layers below your character layers
- Use photographic textures as references or overlays for added realism
- Apply a subtle blur to backgrounds to create depth of field
- Adjust color temperature to complement your character’s palette
For urban scenes, master the one-point and two-point perspective techniques commonly used in anime to create those iconic city backgrounds.
Character Integration
To ensure your characters look like they belong in their environment:
- Add environmental lighting effects on your characters
- Create subtle shadows cast by characters onto the background
- Adjust character colors slightly to reflect environmental color casts
These integration techniques create a cohesive scene rather than characters that appear “pasted on” to their backgrounds.
Composition Tips
Effective anime scene composition relies on:
- Using the rule of thirds for balanced character placement
- Creating depth through foreground, midground, and background elements
- Directing the viewer’s eye through leading lines
- Establishing mood through color harmony and contrast
Remember that composition should support storytelling—consider what emotion or narrative moment you’re trying to convey and design your composition accordingly.
Finalizing and Optimizing Your Anime Artwork
The final polish can make the difference between amateur and professional-quality anime artwork.
Color Correction and Mood Enhancement
Use adjustment layers to fine-tune your artwork:
- Levels adjustment to enhance contrast
- Color Balance to create cohesive color schemes
- Selective Color to fine-tune specific hues
- Vibrance/Saturation to control color intensity
Try adding a subtle Color Lookup adjustment layer to quickly establish specific anime aesthetic styles like “warm sunset” or “cool moonlight.”
Adding Final Details
Small details can dramatically elevate your artwork:
- Add subtle texture to clothing and hair
- Include environmental details like dust particles or atmospheric effects
- Apply subtle noise to prevent banding in gradients
- Add a vignette to focus attention on your subject
Remember that in anime, less is often more—add details strategically rather than overwhelming your composition.
Exporting for Different Platforms
Optimize your artwork for various uses:
- For print: Export as TIFF or PSD at 300 DPI with CMYK color profile
- For web: Save as PNG for transparency or JPG at 72 DPI with RGB profile
- For social media: Create platform-specific crops (square for Instagram, wide for Twitter headers)
Always keep your layered original file (.PSD) for future edits or client revisions.
Turning Your Anime Art Skills Into Client Work
Now that you’ve developed these skills, it’s time to leverage them for your design business.
Building an Anime-Focused Portfolio
Create a dedicated section in your portfolio for anime-style work. Include:
- Character design examples showing your range
- Process breakdowns showing your workflow
- Complete illustrations demonstrating your ability to create finished artwork
- Any commercial applications (book covers, game assets, etc.)
Remember, clients want to see exactly the style they’re looking to hire, so create samples that showcase the specific anime aesthetics you want to be hired for.
Finding Clients for Anime Artwork
Anime-style design has specific client markets:
- Independent game developers looking for character designs
- Young adult and graphic novel publishers
- YouTube content creators needing channel art and thumbnails
- Merchandising companies seeking anime-inspired designs
Target these markets specifically rather than general design clients who may not value the specific skills required for quality anime artwork.
Pricing Your Anime Design Work
Anime design requires specialized skills that should be valued accordingly:
- Research market rates for similar specialized illustration work
- Consider time investment for complex pieces
- Factor in commercial usage rights
- Create tiered pricing based on complexity and deliverables
Don’t undervalue your specialized skills—clients seeking authentic anime artwork understand the expertise required and are willing to pay appropriately.
Wrapping Up and Next Steps
Creating anime-style artwork in Photoshop is a journey that combines technical skill with artistic expression. From mastering the fundamentals of linework and coloring to developing advanced techniques for complete scene creation, you now have the tools to create stunning anime illustrations that will enhance your portfolio and attract specialized clients.
Remember that like any artistic discipline, anime illustration requires consistent practice. Set aside regular time to implement these techniques, study professional anime art, and develop your own unique take on the style.
If you’ve found this tutorial helpful, consider exploring my other design resources or joining our creative community where we regularly share techniques and offer feedback on work-in-progress.
Have questions about turning these skills into client work? Drop me a line anytime—I’m always happy to help fellow creatives build sustainable businesses around their artistic passions.
Now go create something amazing!